This page explains how to integrate a SuperSaaS schedule into a Wix based website, so that your users only need to sign in once to access both your website and the SuperSaaS schedule within it.
The Wix widget automatically logs your users in to their user account in SuperSaaS using their Wix login details.
This widget can also be used without single sign-on to help with the installation process, but if you want your users to log in to SuperSaaS separately you might want to use our general widget builder instead.
Our Wix widget is currently not available in the Wix App Market, but it can be installed using the link to widget. Before you install, please read all instructions on this page.
The link to install the widget can only be used 80 times, so if it has expired please contact to generate a new link.
Preparing for widget installation on Wix
Before you install the widget, go to Wix and open the Wix Website Editor to prepare your site for the integration of the widget.
Enable the developer mode for your site. This is important for following the steps later on in these instructions.
Add a Wix login button into your website. You can do this from the Add Elements menu if one doesn’t exist already.
Choose the Login Bar option to add a login button to your Wix site. (You might have to search for it in the search bar.)
Important: you can only add the Login Bar if you have already added the Wix Members Area app. If you have not done so, you will see a Wix notification instructing you to add this first.
Installation of the widget on Wix
The steps below outline how to install the Wix widget on your Wix site. This is the most technical part of the entire setup process, so we recommend reading through these instructions carefully before you start.
Before you begin the installation of the widget, make sure that you close all the other site editor windows in your browser, as they can interfere with the installation.
Start integrating the widget into your Wix site by clicking the link to widget. If the link doesn’t work anymore please to generate a new link. The link should open the following screen:
Click “Install App” to proceed.
Select the Wix site you want the widget to be installed on. If you have multiple sites, the widget will only be installed on the site you select.
Accept permissions to ensure that the widget can be installed on your Wix site.
The widget will now be added to your site.
After the widget has been inserted on the page, you should see a blurred frame with the outline of a schedule.
You can already resize the widget frame, but you can also do it when you have completed the installation process.
Navigate to the SuperSaaS Dashboard in Wix. You can often do this directly from your site editor by clicking the Dashboard button at the top of the SuperSaaS widget. If that button is not available, you can find the SuperSaaS Dashboard in the Apps section on the Wix site dashboard:
Log into your SuperSaaS account on the SuperSaaS dashboard in Wix. Fill in all the required details. You will need to copy and paste your API key from SuperSaaS to enable single sign-on.
You can generate an API key for your SuperSaaS account by clicking the Generate button at the bottom of the Account Info page in SuperSaaS.
Click “login” to check your credentials. If you added your account name, password and API key correctly you will see a confirmation message with some additional information. You only need to complete the dashboard login via Wix once.
Configuring the widget on Wix
After you have added your credentials you may go back to the widget on the editor and click “Configure Schedule”. If all has gone well then you can set up the widget.
There are two available options, Basic and Advanced
The Basic option directly fetches all your SuperSaaS schedules. You can select the schedule you want and it will automatically load. When you are ready, click to “Save” your changes or “Publish” your Wix page at the top of your Wix editor.
In the Advanced option you can use our widget builder to generate a code snippet. Copy and paste it into the Widget Configuration screen. When you are ready, click to “Save” your changes or “Publish” your Wix page at the top of your Wix editor.
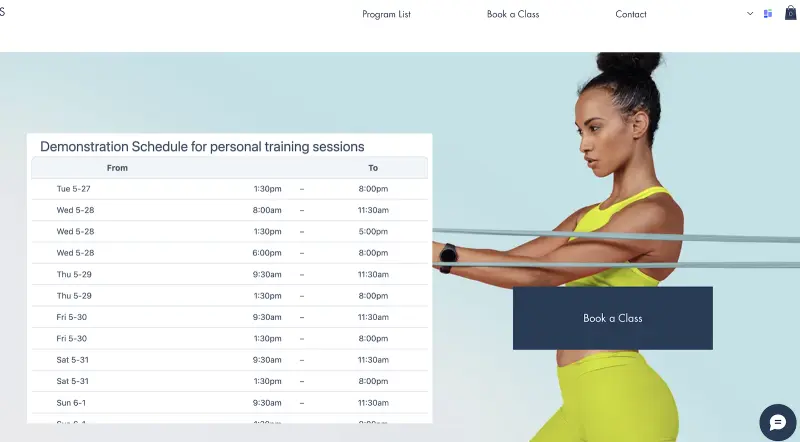
If you have selected the basic option or you added a frame in the advanced option, it will likely look something like the schedule below. If you want to resize the frame, you can do so directly in the editor.
Reload Wix page automatically when a user logs in
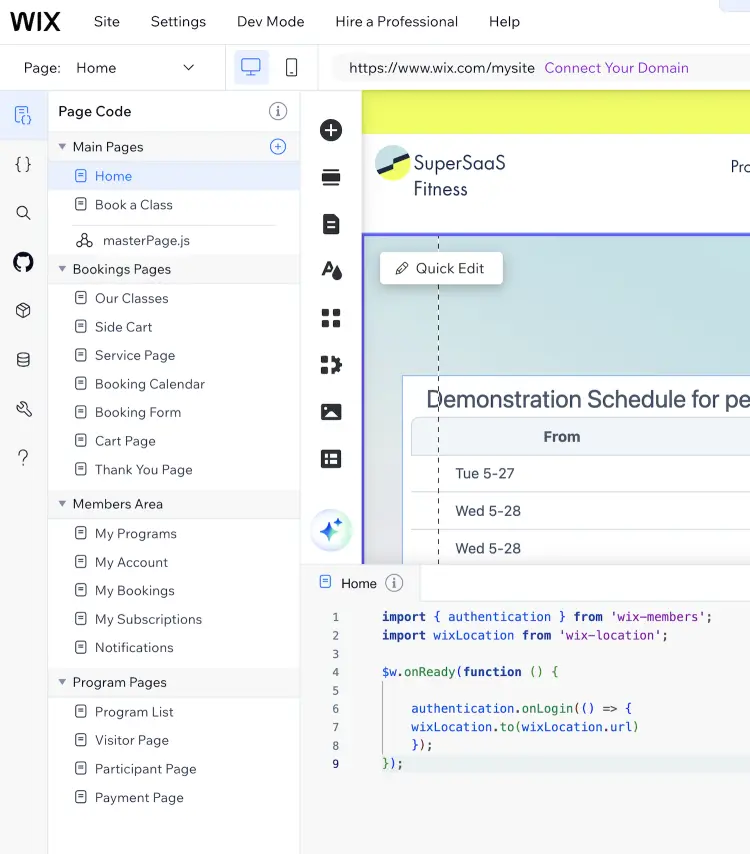
If your Wix page should reload after the user signs in so they are also automatically logged in to SuperSaaS, copy the following code to the page where you put the widget.
import { authentication } from 'wix-members';
import wixLocation from 'wix-location';

$w.onReady(function () {
    authentication.onLogin(() => {
    wixLocation.to(wixLocation.url)
    });
});
Make sure to paste the code above any existing code in the code section at the bottom of your Wix editor page. It should look something like the screenshot below:
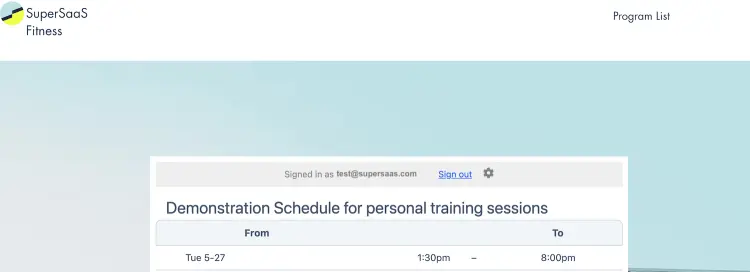
Now that you have added single sign-on, the schedule frame will contain a menu bar that indicates the user is logged in. It should look like something like this:
Updating your credentials or API key in the database
IMPORTANT! The SuperSaaS database is intentionally set to “Private” to protect your login details. Do not change the permissions for this collection as you might be exposing your personal information to the public.
If you want to change your credentials in the future, you can do so directly in the Wix Website Editor. This is useful if you change your SuperSaaS account name, for example.
When you first logged in on the SuperSaaS Dashboard in Wix, it created a unique collection with a unique ID for the credentials. To change these credentials later, you need to find the Databases section in the Wix editor.
You can edit your credentials in the @SuperSaaS collection. If you added your API key previously, you will also find it stored here. If you did not add it before, you can still add it here at any time.